
The first steps to install twik are super simple. First, enter the sign in/log in page by visiting twik.io.
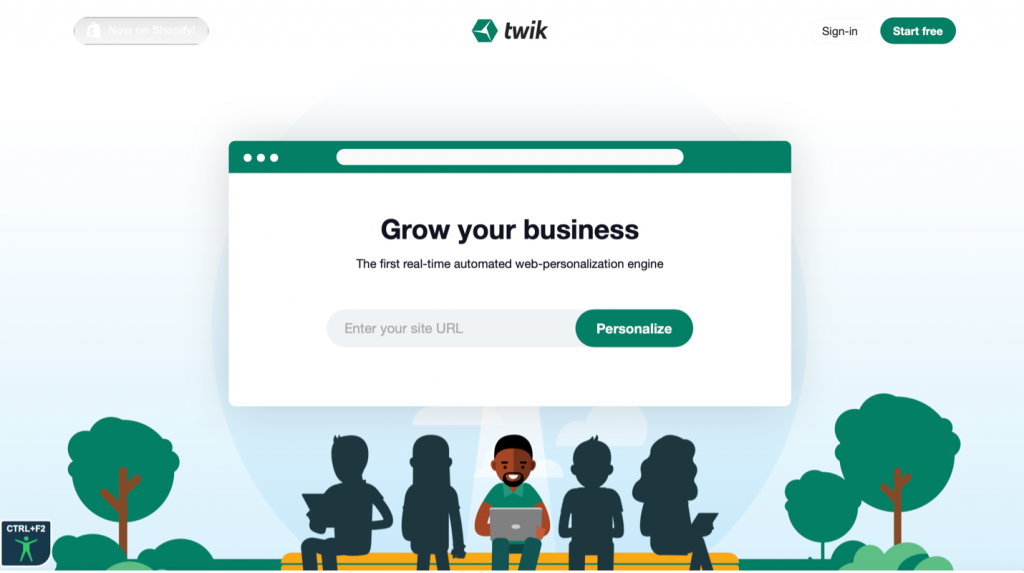
If you already have an existing account and you would like to just sign in, then click sign in at the top right corner to sign into your existing account. You will then be re-directed to your existing twik dashboard.
For newcomers, you have two options to sign in.
You can either click Start free at the top right corner of the page and sign up with your Google account, or you can first enter your site’s URL in the middle of the page and click Personalize, which will then ask you to sign up with an existing Google account.
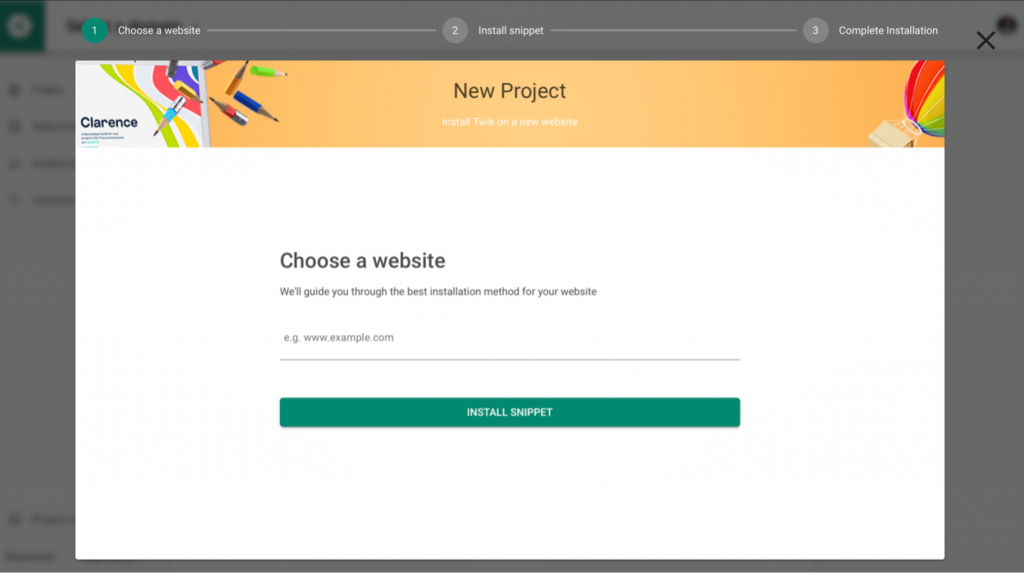
Once you’ve completed one of the two sign up options above, the above image is what you should see on your screen.
Enter in the domain you wish to have twik installed on and click Install Snippet.
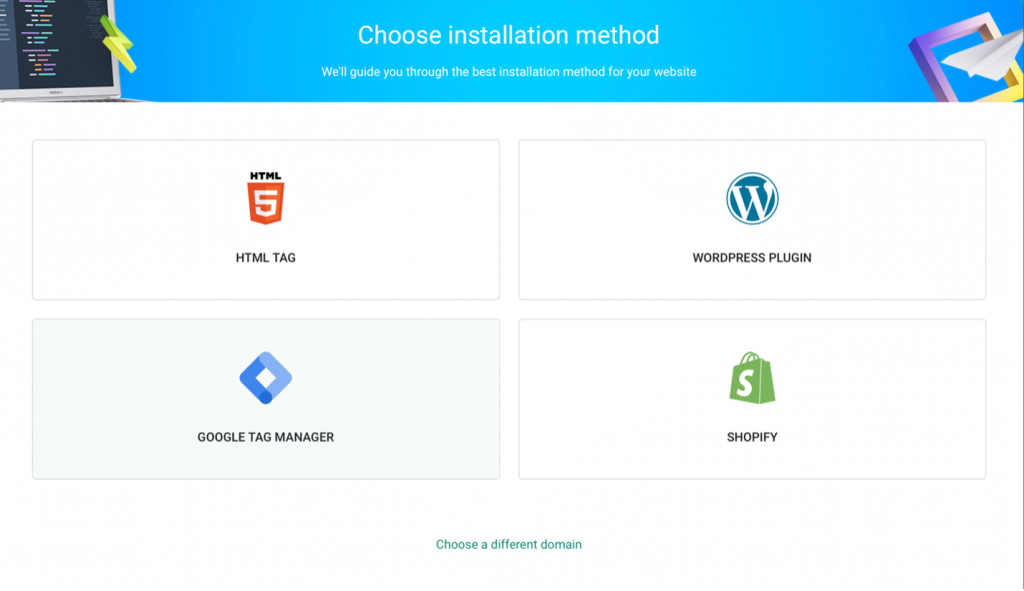
The next step is choosing your installation method from the four installation methods presented here: Shopify, WordPress Plugin, Google Tag Manager, and HTML Tag. Note that those with WooCommerce sites can also install twik using the WordPress Plugin.
Below the four installation methods, you can click ‘Choose a different domain,’ if you’d like to go back to the previous step where you first entered the domain you would like twik installed on.
To install twik through WordPress Plugin, first select WordPress Plugin when you’re asked to choose your installation method.
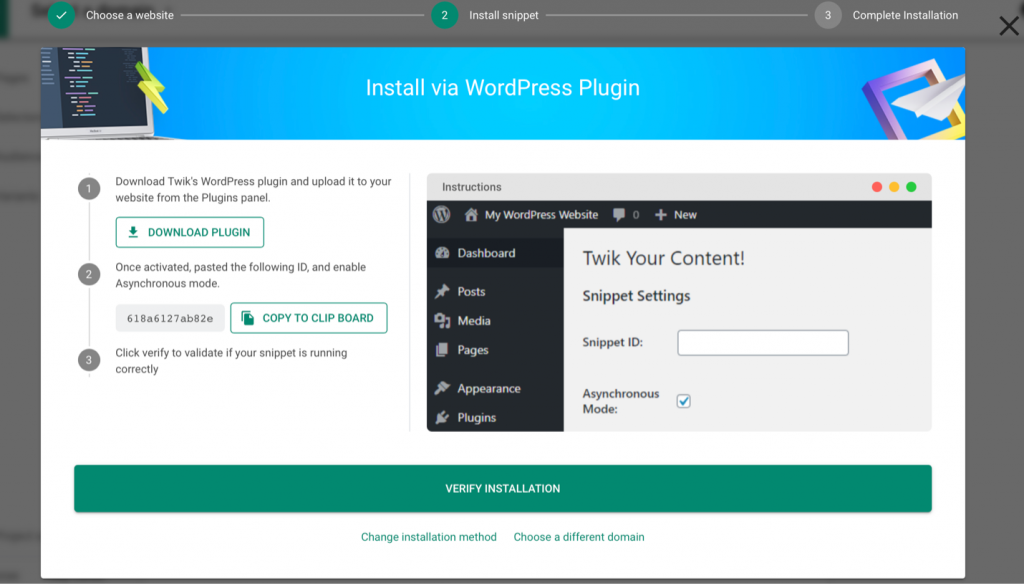
Once you do so, this is what you should see on your screen.
First click ‘Download Plugin’ to download the plugin.
![]()
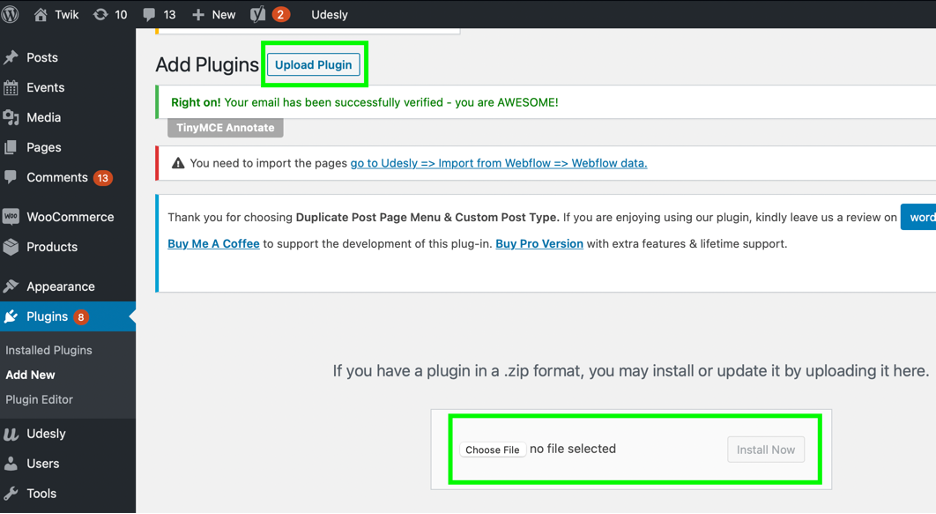
Once the plugin has been downloaded, go to the panel called Plugins on your WordPress account > click Add New > Upload Plugin > Upload.
Once you’ve successfully uploaded the twik plugin to your WordPress account, you should now see an additional panel on the left-hand side of your WordPress account named twik.
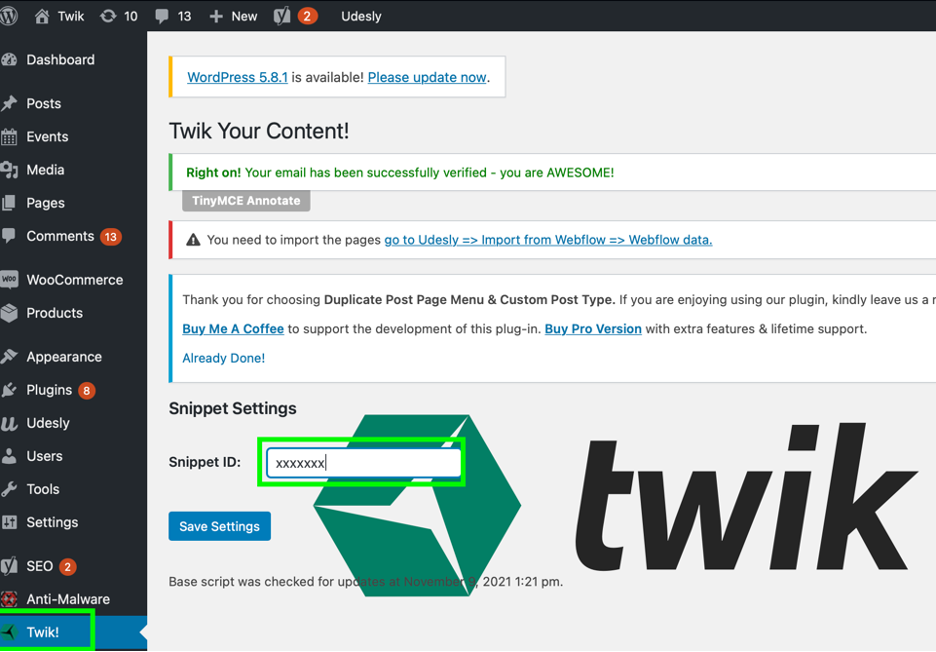
Now, copy the snippet ID to your clipboard (as directed in step two in the image above), then go to the new panel called ‘twik’ in your WordPress account and paste the snippet ID into the text box next to where it says ‘snippet ID.’
Once you’ve done that, click Verify Installation at the bottom of the screen to verify your installation. If there is a problem installing twik, you’ll receive an error message on this page.
At any point in this process, you have the option to choose a different domain or change your installation method at the bottom of this page, under the Verify Installation button.
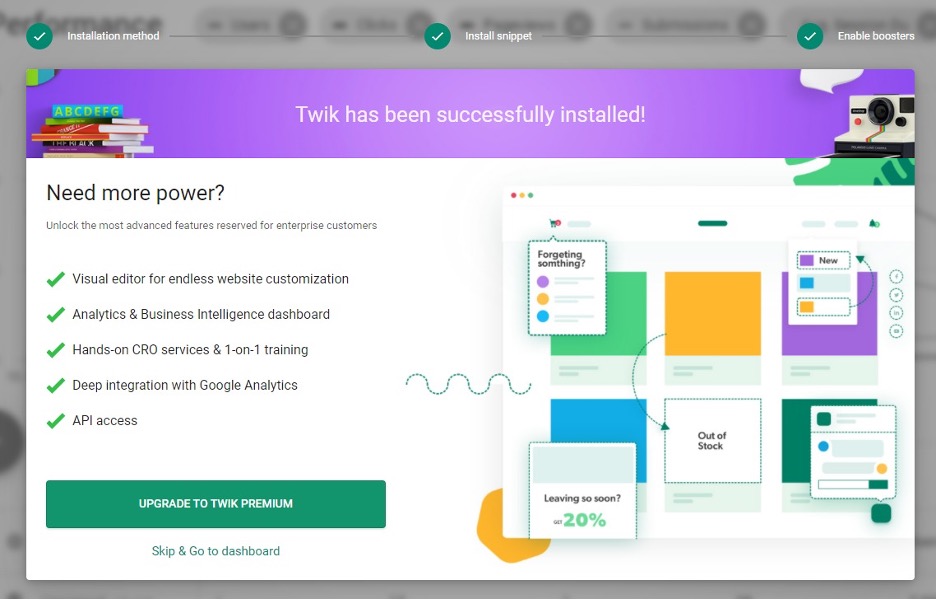
If the installation was successful, you’ll then see this image on your screen notifying you that twik has successfully been installed and gives you the option to upgrade to twik premium. If you’re not interested in the upgrade, just click Skip & Go to dashboard at the bottom of the page to view your dashboard.